I made a few mistakes on my media box playing around with packages that had more dependencies than I originally thought... At any rate, I decided it would make more sense to just reinstall and start fresh than to try and pick up the pieces. After going through the reinstall, formatting my OS hard drive and installing Ubuntu, it asked for a reboot. When it restarted, I hit the following Grub error:
Error 24: Attempt to access block outside partition
After doing a ton of searching online, I finally figured out that this was a problem with my menu.lst file that Grub uses to boot. In my case, it was attempting to boot off the wrong HD with the line:
boot (hd4,0)
To correct this, I had to do a temporary and then a permanent fix. The temporary fix is needed to get Ubuntu to boot at all, and because I wasn't able to figure out an effective way to edit the menu.lst file without being able to boot into Ubuntu in the first place...
So, for the temporary fix, when you start (or reboot) your computer, wait for the Grub loading stage and hit escape to interrupt the countdown (usually 3 seconds by default) and enter the grub menu.
Once in the Grub menu, hit 'e' to begin editing. Look for the line that starts with 'boot' and make sure it's set to 'boot (hd0,0)'. If it's not, go down to that line if you're not already on it and hit 'e' to edit that line. Change 'hdX' (where X is any number NOT 0) to 'hd0' and hit enter to accept the change. Then hit 'b' to boot with those settings.
*NOTE* If your boot line was set to (hd0,0), check here for other alternatives.
Once you've done this, you should be able to boot Ubuntu. Now you need to make sure you don't have to do this every time! To do this...
Open a terminal and type:
'sudo vi /boot/grub/menu.lst'
This will open your menu.lst file for editing. (If you're not used to editing in vi, you can also try gedit by typing 'gksudo gedit /boot/grub/menu.lst')
In either case, once you have the file open, navigate down past all the commented lines (lines starting with '#') towards the bottom of the file. There you'll see three sections, one to load Ubuntu, one to load Ubuntu in recovery mode, and one to run the Ubuntu memtest. In all three of these sections, there's a line similar to:
root (hdX,0)
In all three sections, edit this line to be:
root (hd0,0)
This will ensure that Grub boots off the right device from now on!
Good luck!
Saturday, August 23, 2008

Thursday, July 24, 2008
Elisa - Updated LIRC Info
I thought it might also be useful to post the direct mappings that I'm using (so you don't have to fish through my LIRCrc file).
Here is a list of button mappings I'm using that are working:
The following bindings no longer work (since v.0.3.1). I'd like to find out the new bindings (or find out if these are going to be fixed).
And lastly, I'd like to find out the mappings (or would like to see them created) for the following functionality:
Fastforward / Rewind (not seek/jump)
Jump to playing media (when in the menu's and media is playing, return to the playing media from anywhere)
Jump to home-screen (jump to the home menu screen from anywhere in the menus)
Next/Previous song or media item in playlist or folder (currently I have to seek forward to get to the next song)
Randomize playlist / folder list for playback
Next Visualization (Jump to the next visualization when songs are playing)
Page Up/Down (in menus - to allow faster scrolling of long media lists)
Jump to Top / Bottom of List (again in menus)
I'm sure there are more for this last list that I'm not thinking of... but that's a good starting point. If you know the mappings for any of these, please share! Like I said in my previous post, I'm willing to put together the LIRC documentation if I can get my hands on all the information.
Perhaps some of this will change with the upcoming 0.5.1 release as well. I'll do some testing when the Ubuntu deb's come out and report my findings.
Here is a list of button mappings I'm using that are working:
| Functionality | Action_Binding |
| OK/Select/Toggle-Play-Pause | activate_key |
| Stop | stop_key |
| Move Up (in menu) | move_up_key |
| Move Down (in menu) | move_down_key |
| Move Right (in menu) | move_right_key |
| Move Left (in menu) | move_left_key |
| Back/Previous Screen (in menu) | toggle_menu_key |
| Mute | toggle_mute_key |
| Volume Up | increment_volume_key |
| Volume Down | decrement_volume_key |
| Jump/Seek Backward | seek_backward_key |
| Jump/Seek Forward | seek_forward_key |
| Toggle Fullscreen Mode | toggle_fullscreen_key |
| Close Elisa | close_key |
The following bindings no longer work (since v.0.3.1). I'd like to find out the new bindings (or find out if these are going to be fixed).
| Functionality | Action_Binding |
| Toggle Play / Pause | toggle_play_pause_key |
| Pause | pause_key |
And lastly, I'd like to find out the mappings (or would like to see them created) for the following functionality:
Fastforward / Rewind (not seek/jump)
Jump to playing media (when in the menu's and media is playing, return to the playing media from anywhere)
Jump to home-screen (jump to the home menu screen from anywhere in the menus)
Next/Previous song or media item in playlist or folder (currently I have to seek forward to get to the next song)
Randomize playlist / folder list for playback
Next Visualization (Jump to the next visualization when songs are playing)
Page Up/Down (in menus - to allow faster scrolling of long media lists)
Jump to Top / Bottom of List (again in menus)
I'm sure there are more for this last list that I'm not thinking of... but that's a good starting point. If you know the mappings for any of these, please share! Like I said in my previous post, I'm willing to put together the LIRC documentation if I can get my hands on all the information.
Perhaps some of this will change with the upcoming 0.5.1 release as well. I'll do some testing when the Ubuntu deb's come out and report my findings.
Monday, April 21, 2008
New Car
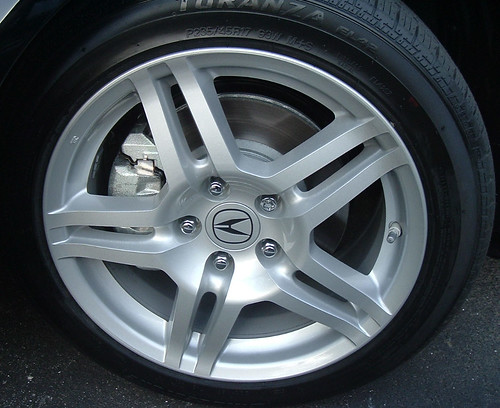
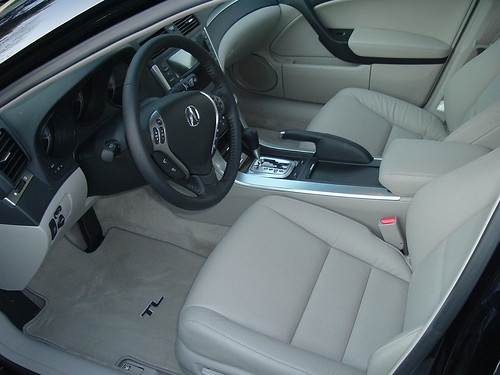
I just picked up a sweet new ride and thought I'd share some photos. The car is a black, 2008 Acura TL with taupe leather interior and sporting 258 hp.
Here are some pics:
From the front
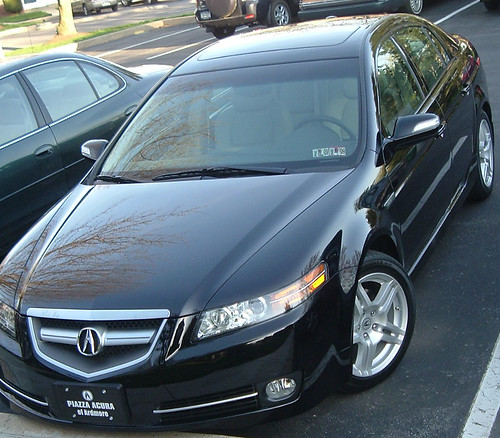
From the back-side

The Back
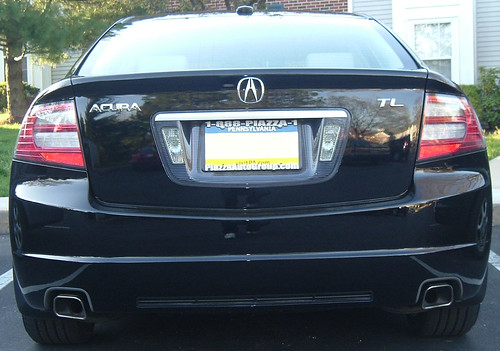
Check out the rims
Stepping into the car... wipe yo feet!
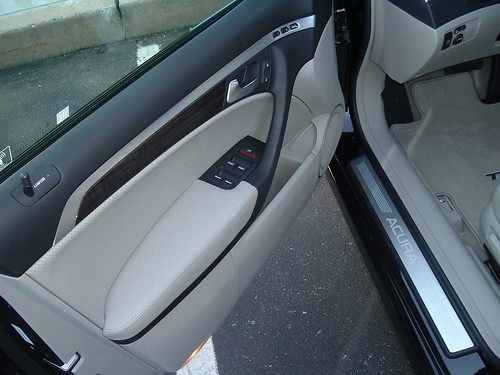
Interior shot
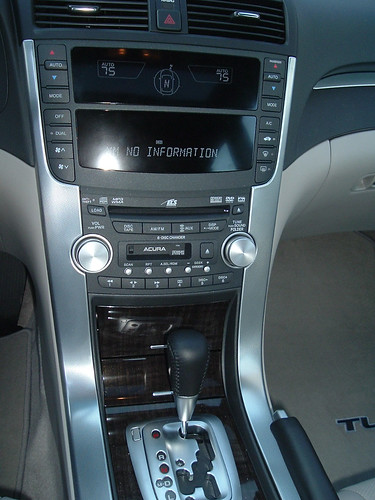
The Dash
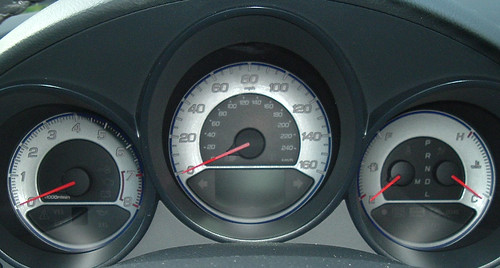
Gauges (they look much better when the car's turned on - especially at night)
Here are some pics:
From the front
From the back-side
The Back
Check out the rims
Stepping into the car... wipe yo feet!
Interior shot
The Dash
Gauges (they look much better when the car's turned on - especially at night)
Saturday, March 1, 2008
Elisa LIRC RC FIle
I realized it may be useful for someone to see the LIRC rc file I generated for Elisa. The file was generated using the steps outlined in my tutorial, but I made some modifications to it.
Like I mentioned in the tutorial, the remote I used was the standard M$ media remote control & receiver ( can be found here ). The remote works great and is easy to configure / install.
However, I did notice that some of the buttons also interact with my xbox 360, which is the reason for some of the modifications I made to the file. Specifically, the Home and Power buttons turn on the 360.
So, I changed the action mapped to the Power button, which was to close Elisa and therefore was rarely used, to the More button. The action that was mapped to the Home button, which was to back up in the Elisa menus, was remapped to the Back button. Besides the fact that it interfered with the 360, I thought that button made more sense as well.
At any rate... here's the LIRC rc file (named elisa.lirc) that I used:
begin
remote = mceusb
prog = elisa
button = Play
config = toggle_play_pause_key
repeat = 0
delay = 0
end
begin
remote = mceusb
prog = elisa
button = Right
config = move_right_key
repeat = 0
delay = 0
end
begin
remote = mceusb
prog = elisa
button = OK
config = activate_key
repeat = 0
delay = 0
end
begin
remote = mceusb
prog = elisa
button = Clear
config = close_key
repeat = 0
delay = 0
end
begin
remote = mceusb
prog = elisa
button = Mute
config = toggle_mute_key
repeat = 0
delay = 0
end
begin
remote = mceusb
prog = elisa
button = VolDown
config = decrement_volume_key
repeat = 0
delay = 0
end
begin
remote = mceusb
prog = elisa
button = Rewind
config = seek_backward_key
repeat = 0
delay = 0
end
begin
remote = mceusb
prog = elisa
button = Stop
config = stop_key
repeat = 0
delay = 0
end
begin
remote = mceusb
prog = elisa
button = Up
config = move_up_key
repeat = 0
delay = 0
end
begin
remote = mceusb
prog = elisa
button = VolUp
config = increment_volume_key
repeat = 0
delay = 0
end
begin
remote = mceusb
prog = elisa
button = Down
config = move_down_key
repeat = 0
delay = 0
end
begin
remote = mceusb
prog = elisa
button = Pause
config = pause_key
repeat = 0
delay = 0
end
begin
remote = mceusb
prog = elisa
button = Enter
config = activate_key
repeat = 0
delay = 0
end
begin
remote = mceusb
prog = elisa
button = Forward
config = seek_forward_key
repeat = 0
delay = 0
end
begin
remote = mceusb
prog = elisa
button = Back
config = toggle_menu_key
repeat = 0
delay = 0
end
begin
remote = mceusb
prog = elisa
button = More
config = toggle_fullscreen_key
repeat = 0
delay = 0
end
begin
remote = mceusb
prog = elisa
button = Left
config = move_left_key
repeat = 0
delay = 0
end
Like I mentioned in the tutorial, the remote I used was the standard M$ media remote control & receiver ( can be found here ). The remote works great and is easy to configure / install.
However, I did notice that some of the buttons also interact with my xbox 360, which is the reason for some of the modifications I made to the file. Specifically, the Home and Power buttons turn on the 360.
So, I changed the action mapped to the Power button, which was to close Elisa and therefore was rarely used, to the More button. The action that was mapped to the Home button, which was to back up in the Elisa menus, was remapped to the Back button. Besides the fact that it interfered with the 360, I thought that button made more sense as well.
At any rate... here's the LIRC rc file (named elisa.lirc) that I used:
begin
remote = mceusb
prog = elisa
button = Play
config = toggle_play_pause_key
repeat = 0
delay = 0
end
begin
remote = mceusb
prog = elisa
button = Right
config = move_right_key
repeat = 0
delay = 0
end
begin
remote = mceusb
prog = elisa
button = OK
config = activate_key
repeat = 0
delay = 0
end
begin
remote = mceusb
prog = elisa
button = Clear
config = close_key
repeat = 0
delay = 0
end
begin
remote = mceusb
prog = elisa
button = Mute
config = toggle_mute_key
repeat = 0
delay = 0
end
begin
remote = mceusb
prog = elisa
button = VolDown
config = decrement_volume_key
repeat = 0
delay = 0
end
begin
remote = mceusb
prog = elisa
button = Rewind
config = seek_backward_key
repeat = 0
delay = 0
end
begin
remote = mceusb
prog = elisa
button = Stop
config = stop_key
repeat = 0
delay = 0
end
begin
remote = mceusb
prog = elisa
button = Up
config = move_up_key
repeat = 0
delay = 0
end
begin
remote = mceusb
prog = elisa
button = VolUp
config = increment_volume_key
repeat = 0
delay = 0
end
begin
remote = mceusb
prog = elisa
button = Down
config = move_down_key
repeat = 0
delay = 0
end
begin
remote = mceusb
prog = elisa
button = Pause
config = pause_key
repeat = 0
delay = 0
end
begin
remote = mceusb
prog = elisa
button = Enter
config = activate_key
repeat = 0
delay = 0
end
begin
remote = mceusb
prog = elisa
button = Forward
config = seek_forward_key
repeat = 0
delay = 0
end
begin
remote = mceusb
prog = elisa
button = Back
config = toggle_menu_key
repeat = 0
delay = 0
end
begin
remote = mceusb
prog = elisa
button = More
config = toggle_fullscreen_key
repeat = 0
delay = 0
end
begin
remote = mceusb
prog = elisa
button = Left
config = move_left_key
repeat = 0
delay = 0
end
Friday, February 29, 2008
Hardware Assembly and Installation
This section of the tutorial shows the steps I took to build the box itself.
As a side note, it's always a good idea to plug in the motherboard to the power supply before getting started and turning it on to ensure the motherboard isn't dead on arrival. You should hear a beep if its working correctly... moving on...
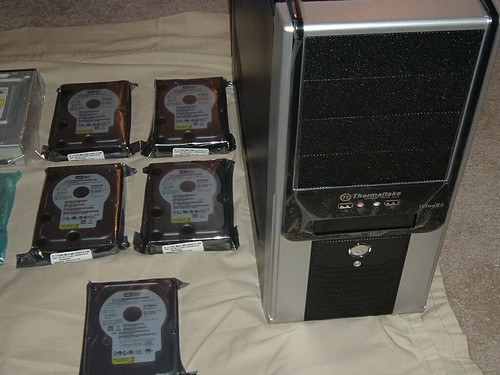
Below is a picture of all the hardware that went into the box. The list of this hardware is on the previous page.

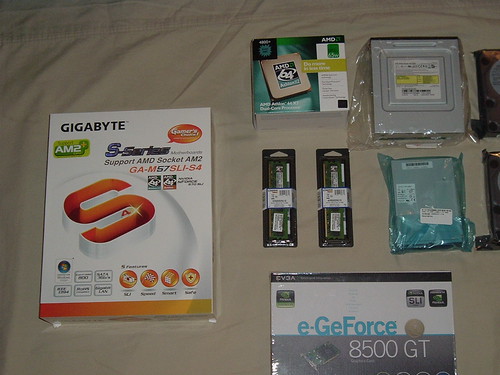
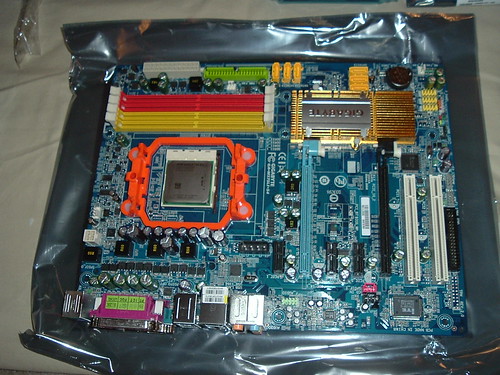
The first step was installing the processor on the motherboard. This is usually pretty simple to accomplish and usually just entails lining up the processor (making sure the symbol on the corner matches the symbol on the motherboard to ensure its oriented properly), and turning the lever to lock the processor down.
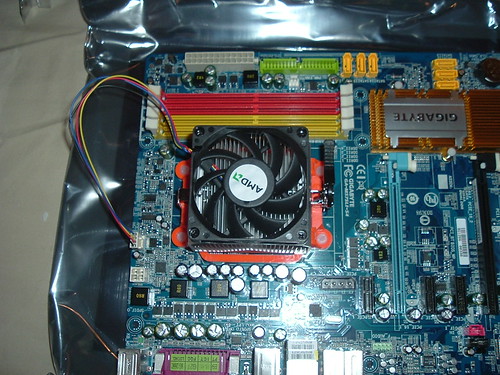
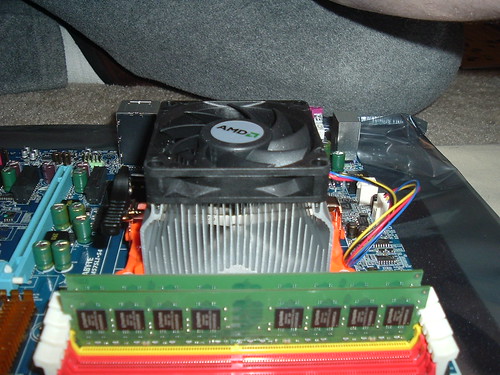
Next I added the fan onto the top of the processor. Some processor / fan combinations require using an insulating gel of some kind. This particular fan has a thermal pad on the bottom and does not require that anything be added between them. Lock the fan down by following the instructions that came with the processor and plug the fan in.
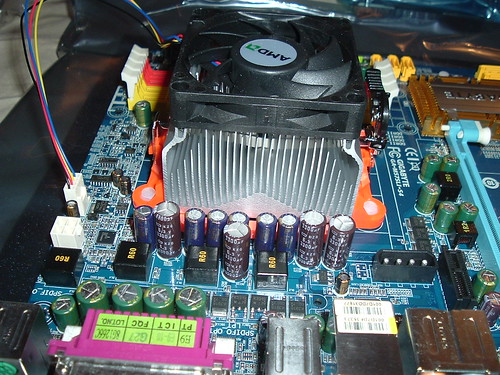
Once this is done, its time to add the RAM. This is pretty self-explanatory...
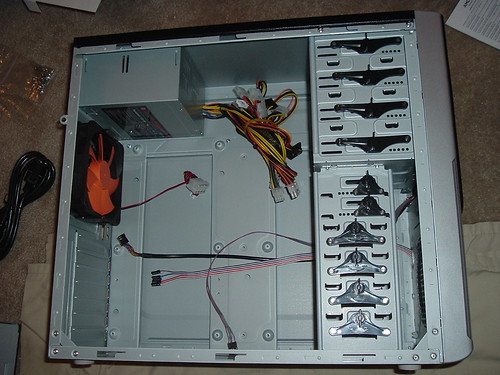
Now it's time to insert the motherboard into the case. Below is a picture of the case I'm using.
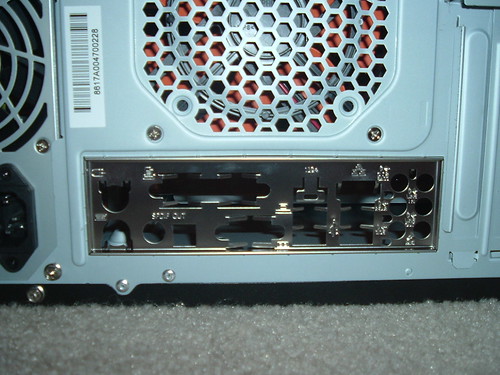
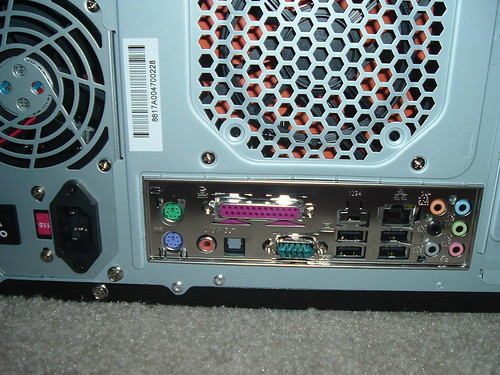
Before I inserted the motherboard, I first had to remove the I/O panel on the back of the case and insert the one that came with the motherboard.
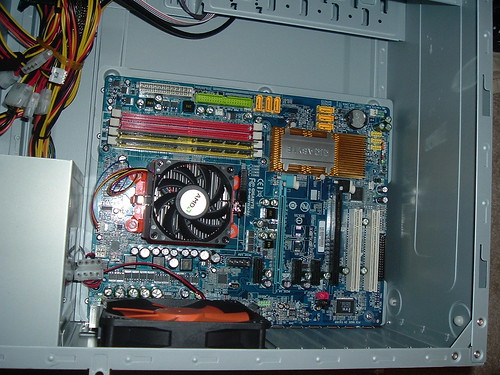
Now that that's done, it's time to place the motherboard into the case and screw it down.
Now that the mobo's in... the real fun begins. The next thing I did was I installed the video card. They are pretty easy to install... just insert into the PCI slot (for PCI cards).
Here's a couple pics of the nvidia 8500GT before and after install.
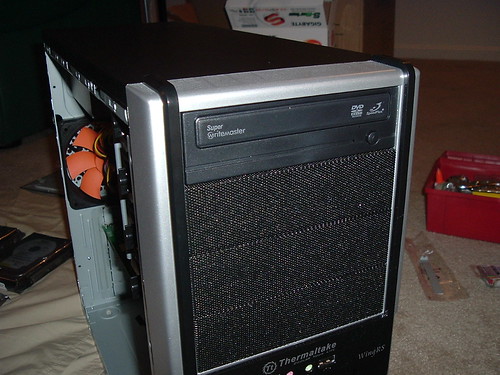
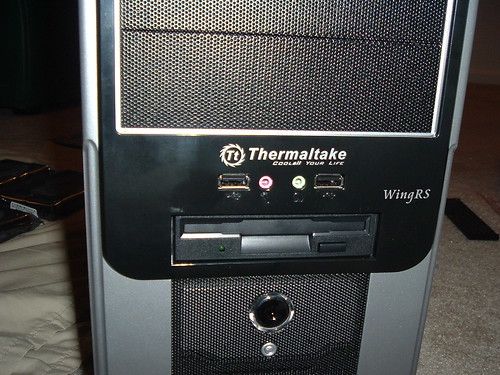
Next I installed the CD/DVD drive and the floppy drive. I popped off the front of the case and removed the panel-covers that were covering the slots for each. Then I inserted the drives and locked them into place. (on my case this is as simple as turning the locking handles. some cases make you screw them into place)
Once those are in, it's time to start inserting hard drives. As i described in the overview... I'm going to be installing one 160gb hard drive to hold the operating system and applications as well as four-500 gb hard drives that are going to be setup as a RAID array and used for file storage.
Here's a picture showing the hard drives placed in the case. (the top one I had to place in a slot not generally used for hard drives... it still worked fine though)
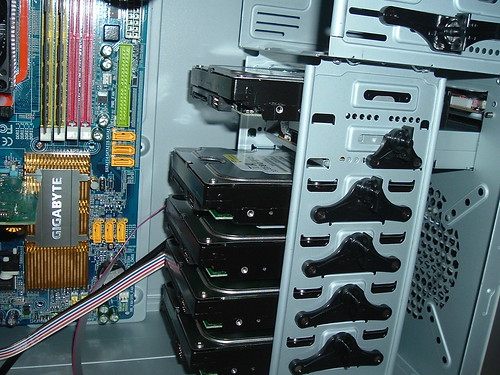
Now it's time to start on connections. I urge you to refer to your motherboard instructions for specific instructions on how to setup all the connections.
I first connected the cables leading to the front power-button, USB connections, and indicator LEDs. These generally go in / near the F_panel.
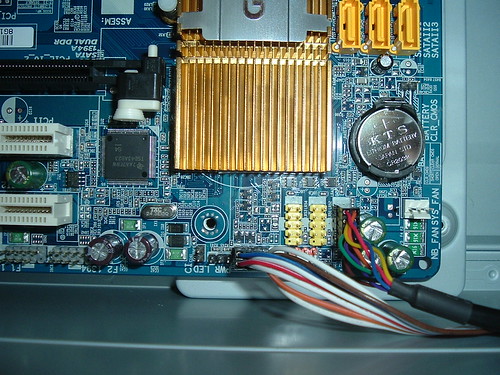
Then it was time to start connecting all the SATA (and my one non-SATA device, the floppy drive). The picture probably doesn't do this justice but it should be relatively self explanatory. Find your SATA ports on your motherboard and connect them to your various SATA devices (in my case the 5 hard drives and the CD/DVD drive) via SATA cables. As a side note... my motherboard only came with 4 SATA cables for the 6 SATA slots it has, so I had to pick up two additional cables.
I also connected power cables to all the various devices, including the hard drives, floppy and CD/DVD drives, motherboard and fan.
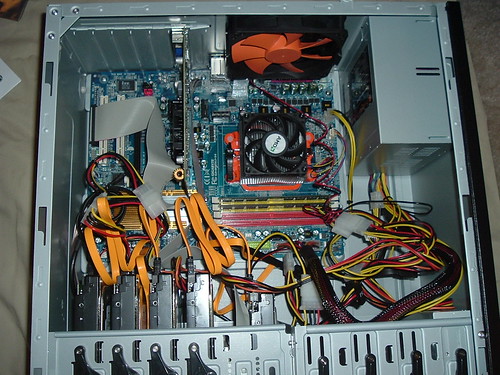
Once all your connections are established, you're ready to fire it up and test it out. I recommend leaving the case off for a bit because you'll need to go back in and unplug things later in this tutorial. Also if you messed up any of the connections, you can get back in faster to fix them.
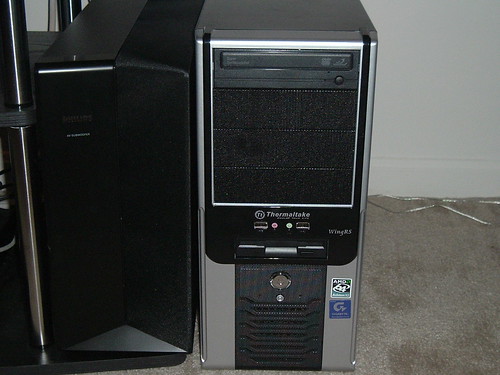
Here's a picture of the finished case sitting next to my sub woofer. (complete with stickers - though I'm still waiting on my ubuntu stickers)
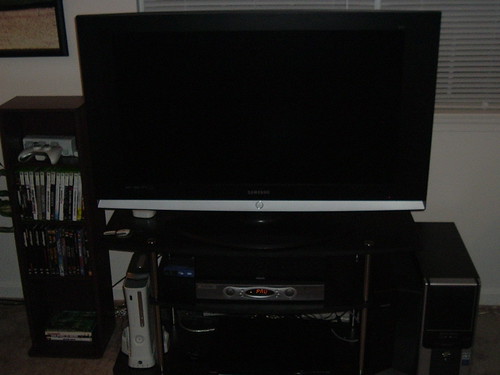
Here's a picture of my entertainment center with its latest addition (bottom right). Sorry it's kinda dark.
Continued: Operating System & Hard Drive Configuration
As a side note, it's always a good idea to plug in the motherboard to the power supply before getting started and turning it on to ensure the motherboard isn't dead on arrival. You should hear a beep if its working correctly... moving on...
Below is a picture of all the hardware that went into the box. The list of this hardware is on the previous page.
The first step was installing the processor on the motherboard. This is usually pretty simple to accomplish and usually just entails lining up the processor (making sure the symbol on the corner matches the symbol on the motherboard to ensure its oriented properly), and turning the lever to lock the processor down.
Next I added the fan onto the top of the processor. Some processor / fan combinations require using an insulating gel of some kind. This particular fan has a thermal pad on the bottom and does not require that anything be added between them. Lock the fan down by following the instructions that came with the processor and plug the fan in.
Once this is done, its time to add the RAM. This is pretty self-explanatory...
Now it's time to insert the motherboard into the case. Below is a picture of the case I'm using.
Before I inserted the motherboard, I first had to remove the I/O panel on the back of the case and insert the one that came with the motherboard.
Now that that's done, it's time to place the motherboard into the case and screw it down.
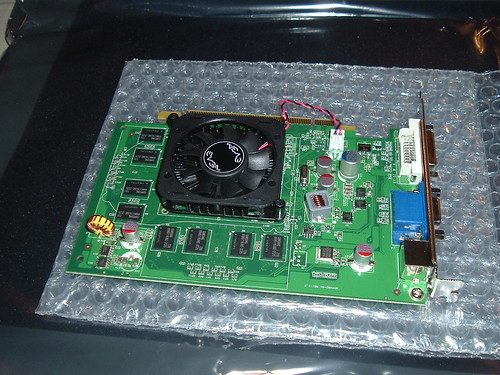
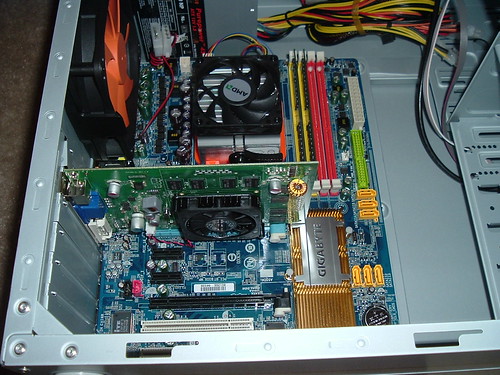
Now that the mobo's in... the real fun begins. The next thing I did was I installed the video card. They are pretty easy to install... just insert into the PCI slot (for PCI cards).
Here's a couple pics of the nvidia 8500GT before and after install.
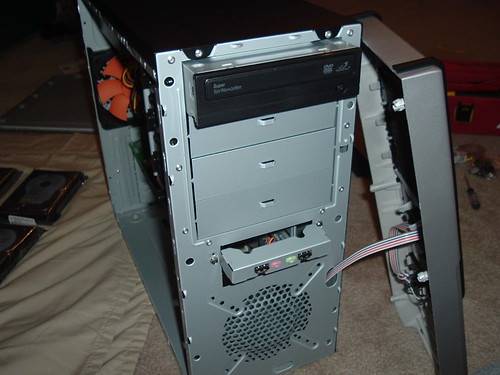
Next I installed the CD/DVD drive and the floppy drive. I popped off the front of the case and removed the panel-covers that were covering the slots for each. Then I inserted the drives and locked them into place. (on my case this is as simple as turning the locking handles. some cases make you screw them into place)
Once those are in, it's time to start inserting hard drives. As i described in the overview... I'm going to be installing one 160gb hard drive to hold the operating system and applications as well as four-500 gb hard drives that are going to be setup as a RAID array and used for file storage.
Here's a picture showing the hard drives placed in the case. (the top one I had to place in a slot not generally used for hard drives... it still worked fine though)
Now it's time to start on connections. I urge you to refer to your motherboard instructions for specific instructions on how to setup all the connections.
I first connected the cables leading to the front power-button, USB connections, and indicator LEDs. These generally go in / near the F_panel.
Then it was time to start connecting all the SATA (and my one non-SATA device, the floppy drive). The picture probably doesn't do this justice but it should be relatively self explanatory. Find your SATA ports on your motherboard and connect them to your various SATA devices (in my case the 5 hard drives and the CD/DVD drive) via SATA cables. As a side note... my motherboard only came with 4 SATA cables for the 6 SATA slots it has, so I had to pick up two additional cables.
I also connected power cables to all the various devices, including the hard drives, floppy and CD/DVD drives, motherboard and fan.
Once all your connections are established, you're ready to fire it up and test it out. I recommend leaving the case off for a bit because you'll need to go back in and unplug things later in this tutorial. Also if you messed up any of the connections, you can get back in faster to fix them.
Here's a picture of the finished case sitting next to my sub woofer. (complete with stickers - though I'm still waiting on my ubuntu stickers)
Here's a picture of my entertainment center with its latest addition (bottom right). Sorry it's kinda dark.
Continued: Operating System & Hard Drive Configuration
Auto-startup of LIRC and Elisa
The next thing I wanted to do was have all of this startup by itself when I turn on my computer. That meant making the media-user auto-login, getting LIRC to start up and then getting Elisa to start up... all automatically.
First I made it so my media-user logs in automatically at startup. I believe you can access this screen in the System menu somewhere, but the location escapes me.
So I did it this way, open a terminal and type:
sudo gdmsetup
This will bring up a window with login preferences. Select the security tab, check "Enable automatic Login" and select the media-user.
Now your media-user will auto-login when the system boots. You can always change users once you're logged in if you would like, but I just use my remote connection instead and leave the media-user logged in all the time.
The next step is to get LIRC to start up automatically. Because the command to start LIRC requires root access (sudo), you need to give yourself permission to execute the command without a password.
To do this, type the following in the terminal:
export EDITOR=gedit && sudo visudo
Change the DEFAULTs line to be:
'Defaults !lecture,tty_tickets,!fqdn,env_keep+="DISPLAY HOME"
At the very end of the file, add the following line (replacing username with your username)
username ALL = NOPASSWD: /etc/init.d/lirc start
Save and Exit.
Now go to system -> preferences -> sessions and add a new startup program. Name it LIRC or something and give it a description if you'd like. For the command use:
sudo /etc/init.d/lirc start
Now the LIRC utility will start (enabling your remote control)
In order for elisa to start automatically, you have to also add it to the session -> startup programs. However, if you just type elisa in there, it will startup before your lirc gets a chance to start up, and the remote wont work.
There may be a better way to do this, but this way works and its easy.
I wrote a simple bash script 'elisa-start' in my media-user's home directory.
vi ~/elisa-start
Add the following in the file:
#/bin/bash/
sleep 15 && elisa
This script, when executed, will wait about 15 seconds, and then execute Elisa. I don't recommend going much faster than 15 or elisa boots before LIRC initializes.
To modify the permissions on the file so everyone can access / execute the file, type:
sudo chmod 777 /home/username/elisa-start
Now go back to system -> preferences -> sessions and add another new program. Call it elisa and add a description if you'd like. For the command use (replacing username with your media-user's name):
/home/username/elisa-start
That should do it. You can try restarting X (ctrl - alt - backspace) to test if the LIRC + Elisa startup works correctly, or you can restart the computer to make sure the user auto-logs in and the LIRC and Elisa start-ups work.
Thats it! You're done! Have fun!
First I made it so my media-user logs in automatically at startup. I believe you can access this screen in the System menu somewhere, but the location escapes me.
So I did it this way, open a terminal and type:
sudo gdmsetup
This will bring up a window with login preferences. Select the security tab, check "Enable automatic Login" and select the media-user.
Now your media-user will auto-login when the system boots. You can always change users once you're logged in if you would like, but I just use my remote connection instead and leave the media-user logged in all the time.
The next step is to get LIRC to start up automatically. Because the command to start LIRC requires root access (sudo), you need to give yourself permission to execute the command without a password.
To do this, type the following in the terminal:
export EDITOR=gedit && sudo visudo
Change the DEFAULTs line to be:
'Defaults !lecture,tty_tickets,!fqdn,env_keep+="DISPLAY HOME"
At the very end of the file, add the following line (replacing username with your username)
username ALL = NOPASSWD: /etc/init.d/lirc start
Save and Exit.
Now go to system -> preferences -> sessions and add a new startup program. Name it LIRC or something and give it a description if you'd like. For the command use:
sudo /etc/init.d/lirc start
Now the LIRC utility will start (enabling your remote control)
In order for elisa to start automatically, you have to also add it to the session -> startup programs. However, if you just type elisa in there, it will startup before your lirc gets a chance to start up, and the remote wont work.
There may be a better way to do this, but this way works and its easy.
I wrote a simple bash script 'elisa-start' in my media-user's home directory.
vi ~/elisa-start
Add the following in the file:
#/bin/bash/
sleep 15 && elisa
This script, when executed, will wait about 15 seconds, and then execute Elisa. I don't recommend going much faster than 15 or elisa boots before LIRC initializes.
To modify the permissions on the file so everyone can access / execute the file, type:
sudo chmod 777 /home/username/elisa-start
Now go back to system -> preferences -> sessions and add another new program. Call it elisa and add a description if you'd like. For the command use (replacing username with your media-user's name):
/home/username/elisa-start
That should do it. You can try restarting X (ctrl - alt - backspace) to test if the LIRC + Elisa startup works correctly, or you can restart the computer to make sure the user auto-logs in and the LIRC and Elisa start-ups work.
Thats it! You're done! Have fun!
Setting up a Remote Connection
One piece of functionality I wanted was the ability to log in remotely and run applications while I'm watching a video in Elisa.
The first step to this process was creating an additional user, which is pretty self explanatory. Basically I will have two users, a remote-user, which I will use for running applications, downloading, surfing the net, or whatever else; and a media-user, which will run Elisa.
So to create another user go to System -> Administration -> Users and Groups and add a new user. Make sure to make this user an administrator.
Now that you have two users, the next step is to install NX server. This will serve as a Remote Desktop server that you can connect to from any other machine that has the client installed.
Before you install NX Server, make sure to install ssh first:
sudo apt-get install openssh-server
To install nx server, visit the following web site:
http://www.nomachine.com/download-package.php?Prod_Id=5
You'll need to install the client, node, and server (in that order) on the host machine. Click the download buttons to download and install each of the programs.
To start the service, just enter the following in the terminal:
sudo /usr/NX/bin/nxserver --start
That should do it. The service should automatically start itself in the event of a reboot / shutdown.
To connect to your machine from another computer, go to the same web site on the other computer and download just the NX Client.
If you're setting this up on a laptop, I recommend setting up two connections, one to be used when you're home and on the same LAN, and one to be used when you're away from home.
Open the client and the connection wizard will pop up. To setup the home connection, type in a name for the connection (can be anything), for the host, type in the local IP address (generally 192.168.1.???), leave the port at 22 (unless you changed it), and select LAN for the connection type. Save the connection and when the login screen comes up, enter the login / password information for the remote-user you created on your media center PC.
To setup an away-from-home connection, open the client again to see the connection wizard. Again type in a name for the connection, the IP address of the computer (you may have to look this up as most people have dynamic IP addresses - there is an alternative method I will discuss in a minute), leave the port as is, and select ASDL (most likely) for your connection type. Save the connection. You will again be prompted for login information and again enter the login / password for the remote-user on your media center PC.
The alternative to using an IP address (which often changes) in the above step is to use a dynamic DNS service. I use no-ip's free ManagedDNS service: http://www.no-ip.com/services/managed_dns/free_dynamic_dns.html
Register for this free service from your home network, and you won't have to remember your IP address anymore. You can select a user name and a domain name (like 'myuser.no-ip.org') and can enter that instead of the IP address in the above step. Just make sure to forward port 22 in your router to the correct local machine. (this means using a static IP address on your local network). This will also work for ftp-servers or web servers or whatever. It basically is a domain configured to route traffic to your router. When you type in a port, your router will forward it to whatever machine you've specified in your router settings.
Continued: Auto-startup of LIRC and Elisa
The first step to this process was creating an additional user, which is pretty self explanatory. Basically I will have two users, a remote-user, which I will use for running applications, downloading, surfing the net, or whatever else; and a media-user, which will run Elisa.
So to create another user go to System -> Administration -> Users and Groups and add a new user. Make sure to make this user an administrator.
Now that you have two users, the next step is to install NX server. This will serve as a Remote Desktop server that you can connect to from any other machine that has the client installed.
Before you install NX Server, make sure to install ssh first:
sudo apt-get install openssh-server
To install nx server, visit the following web site:
http://www.nomachine.com/download-package.php?Prod_Id=5
You'll need to install the client, node, and server (in that order) on the host machine. Click the download buttons to download and install each of the programs.
To start the service, just enter the following in the terminal:
sudo /usr/NX/bin/nxserver --start
That should do it. The service should automatically start itself in the event of a reboot / shutdown.
To connect to your machine from another computer, go to the same web site on the other computer and download just the NX Client.
If you're setting this up on a laptop, I recommend setting up two connections, one to be used when you're home and on the same LAN, and one to be used when you're away from home.
Open the client and the connection wizard will pop up. To setup the home connection, type in a name for the connection (can be anything), for the host, type in the local IP address (generally 192.168.1.???), leave the port at 22 (unless you changed it), and select LAN for the connection type. Save the connection and when the login screen comes up, enter the login / password information for the remote-user you created on your media center PC.
To setup an away-from-home connection, open the client again to see the connection wizard. Again type in a name for the connection, the IP address of the computer (you may have to look this up as most people have dynamic IP addresses - there is an alternative method I will discuss in a minute), leave the port as is, and select ASDL (most likely) for your connection type. Save the connection. You will again be prompted for login information and again enter the login / password for the remote-user on your media center PC.
The alternative to using an IP address (which often changes) in the above step is to use a dynamic DNS service. I use no-ip's free ManagedDNS service: http://www.no-ip.com/services/managed_dns/free_dynamic_dns.html
Register for this free service from your home network, and you won't have to remember your IP address anymore. You can select a user name and a domain name (like 'myuser.no-ip.org') and can enter that instead of the IP address in the above step. Just make sure to forward port 22 in your router to the correct local machine. (this means using a static IP address on your local network). This will also work for ftp-servers or web servers or whatever. It basically is a domain configured to route traffic to your router. When you type in a port, your router will forward it to whatever machine you've specified in your router settings.
Continued: Auto-startup of LIRC and Elisa
Subscribe to:
Posts (Atom)